Whether you’re sat in front of your computer at home or at work, chances are your smartphone is within easy reach – even if you really shouldn’t be answering SMS messages during working hours!
Smartphones can be a serious distraction. Even if you just glance at your smartphone screen, realise it’s only a Facebook notification, and then immediately get back to work, that notification has still interrupted your flow. And if you’re receiving multiple notifications throughout the day then your smartphone can become a serious obstacle to getting your work done.
While putting your smartphone on silent or even switching it off might seem like the obvious solution, this isn’t always practical, for example maybe you’re listed as the contact for your child’s school, or you occasionally receive business calls on your mobile.
One solution is to make your smartphone notifications less intrusive, by syncing them to your Mac. At this point, all incoming smartphone notifications will appear in the upper-right corner of your Mac’s screen, so you can see at a glance whether this notification is an SMS that you can’t afford to ignore, or just a heads-up that you’ve been tagged in a photo on Facebook.
By the end of this article you’ll know how to sync all notifications from your iPhone or Android device, to your Mac, using the free Pushbullet service.
Installing Pushbullet on your Mac and Smartphone
The first step, is to install Pushbullet on your smartphone.
Pushbullet is available for iPhone and Android, so either head over to the App Store (iPhone) or Google Play (Android) and follow the onscreen instructions to install ‘Pushbullet – SMS on PC.’
Once Pushbullet is installed, you’ll need to configure it. Note that the following instructions were written using Pushbullet for Android, but the steps should be largely the same for the iOS app.
- Launch Pushbullet, and then select either ‘Sign in with Google’ or ‘Sign in with Facebook.’
- Read the onscreen warning, and if you’re happy to proceed then tap ‘Allow.’
- When prompted, tap ‘Enable,’ and then drag the ‘Pushbullet’ slider into the ‘On’ position.
- At this point, Pushbullet will request access to your Phone and Contacts information. Read the dialogue box, and if you’re happy to proceed then tap ‘OK,’ followed by ‘Allow.’
- Pushbullet will request permission to view your conversation history, and the ability to send and receive texts from your computer. If you’re happy to grant these requests, then tap ‘Enable,’ followed by ‘Allow.’
- Tap ‘Done.’
Next, you’ll need to install Pushbullet on your Mac. Pushbullet is available as an extension for Chrome, Firefox and Opera. Although it was previously available as a Safari extension, the Pushbullet team decided to drop support for Safari due to changes in Apple’s review process.
In this tutorial, I’m using Pushbullet for Chrome:
- Open the Chrome web browser, and navigate to Pushbullet’s page in the Chrome Web Store.
- Click ‘Add to Chrome.’
- Select the little ‘1’ icon that appears in Chrome’s upper-right corner.
- Select ‘Sign In.’
- Sign in with the same credentials you used for the mobile app, and follow the authentication instructions.
- The subsequent screen displays the various tasks you need to complete, in order to use the full Pushbullet functionality. Since we’ve already setup Pushbullet on our computer, give the ‘Set up your computer’ item a click, and then select ‘Done.’
- To verify that everything is setup correctly, open the Pushbullet app on your mobile and drag the side-menu open.
- Select ‘Notification Mirroring.’
- Give the ‘Send a test notification’ menu icon a tap. If everything is setup correctly, a notification will appear in the upper-right corner of your Mac. All subsequent smartphone notifications will now be mirrored on your computer.

Do you need to mirror all your notifications?
While mirrored notifications received on your Mac are less distracting than having to physically check your smartphone every time you receive a new notification, mirrored notifications are still a distraction.
Notifications about an incoming call or important SMS message may be a necessary distraction, but do you really need to know that you’ve just gained another follower on your personal Twitter account, when you’re supposed to be concentrating on work?
To avoid being bombarded by unnecessary mirrored notifications, you can pick and choose which notifications get pushed to your Mac:
- Open the Pushbullet app on your mobile.
- Open the side-menu and give ‘Notification mirroring’ a tap.
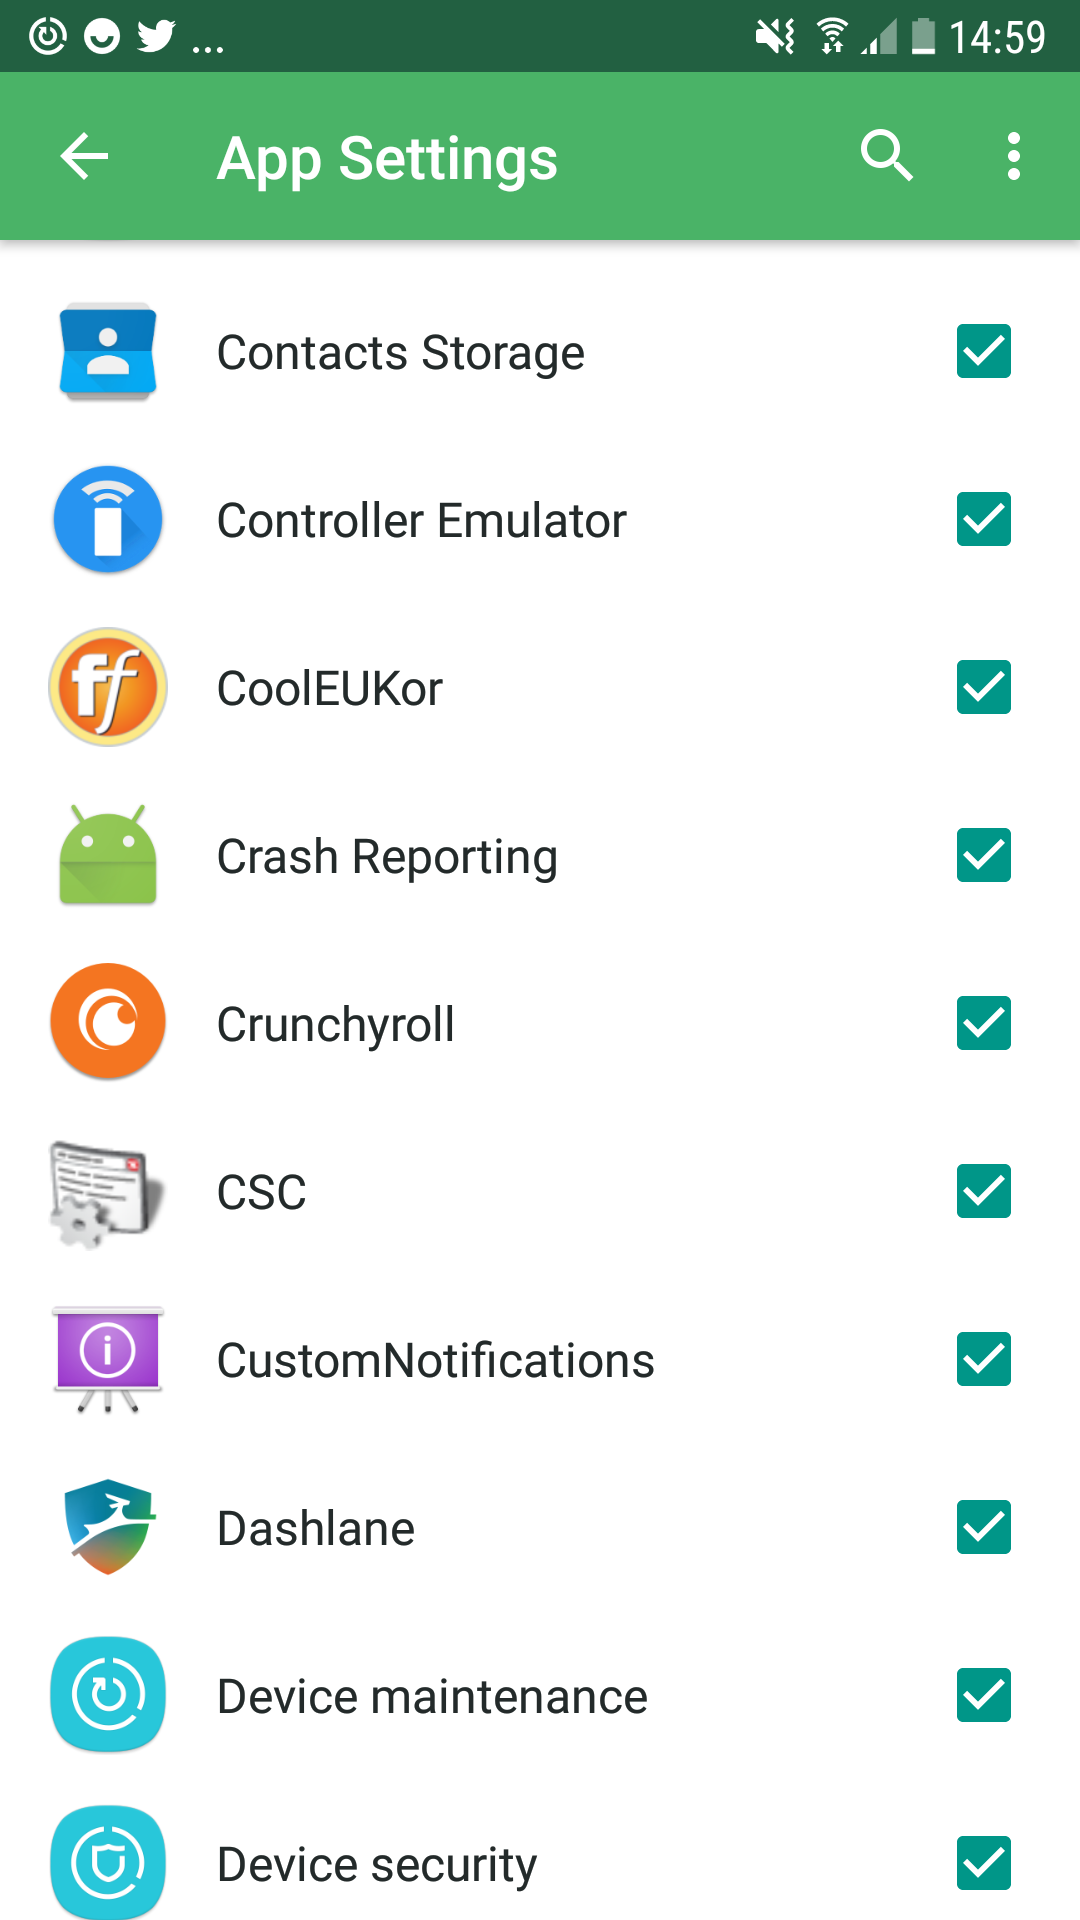
- Select ‘Choose which apps to enable.’

- Deselect any app or service that you don’t want to use with Pushbullet’s notification mirroring feature.


Add Comment