There’s nothing quite as frustrating as slow Wi-Fi.
Even when you’re under the same roof as a fast, reliable router, such as in your home or office, your exact location within that building can have an impact on the quality of your connection. There’s often locations in a building where the Wi-Fi suddenly seems to become weaker or run slower, and there may even be Wi-Fi black spots where you can’t connect to the Internet at all.
In this article, I’ll show you how to use the Wi-Fi SweetSpots mobile application to map out the Wi-Fi across your home or office, so you know exactly which areas get the best signal, and which areas get the worst. Armed with this information, you can then either change where you connect to the Internet, such as moving your desk, or employ a range of Wi-Fi extending and boosting techniques, to improve the signal in areas of the building where the Wi-Fi isn’t quite up to scratch.
Even if you’re pretty satisfied with your Wi-Fi, it’s still worth downloading this app, just to check whether you can get even faster, stronger Wi-Fi by shifting your desk to the other side of the room, or by tweaking the position of your router.
Location, location, location
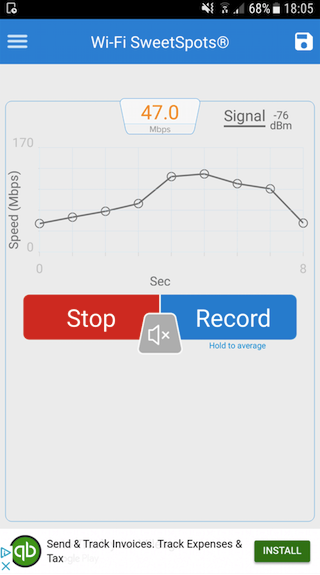
Wi-Fi SweetSpots is a free app that’s available for iOS and Android, that measures the strength of the Wi-Fi connection wherever you’re currently stood. By installing Wi-Fi SweetSpots on your smartphone and going for a wander around your home, you can pinpoint the exact location where you should be connecting to the Internet, in order to get the fastest and most reliable Wi-Fi.
To use this app:
- Download Wi-Fi SweetSpots to your Android or iOS device. This article was written using the Android app, but the steps should be largely the same for iPhone users.
- Make sure you’re connected to the network that you want to test.
- Launch the Wi-Fi SweetSpots app, and then tap ‘Start.’
- The app will now start recording how your Wi-Fi speed fluctuates over time, and display this information as a graph.

In the best case scenario, you identify the area that has the strongest, fastest and most reliable Internet connection, and then make this the location where you access the Internet, for example by moving your Mac, your Smart TV, or even your sofa, ready for the next time you’re having a lazy afternoon browsing the web on your smartphone or tablet.
However, the easiest solution isn’t always possible! If you can’t relocate to the area that has the strongest Wi-Fi, then you’ll need to make that strong, reliable Wi-Fi signal come to you.
In the rest of this article, I’m going to share some tips for boosting your Wi-Fi in areas where it may currently be lacking. For the best results, you should use Wi-Fi SweetSpots to measure the signal before, and after you make these adjustments, so you’ll know the exact impact of your changes.
Move your router
If you can’t move your furniture, then how about moving your router?
Walls and doors have a dramatic impact on the strength of your Wi-Fi signal, but metal can also block the signal coming from your router, so even increasing the distance between the router and a nearby radiator or metal filing cabinet, can change the way the Wi-Fi is dispersed throughout your home.
Baby monitors, wireless security cameras and microwaves have also been known to interfere with your Wi-Fi, so if any of these items are close to your router then you should move them wherever possible, to see how this impacts your Wi-Fi SweetSpots readings.
Change your DNS settings
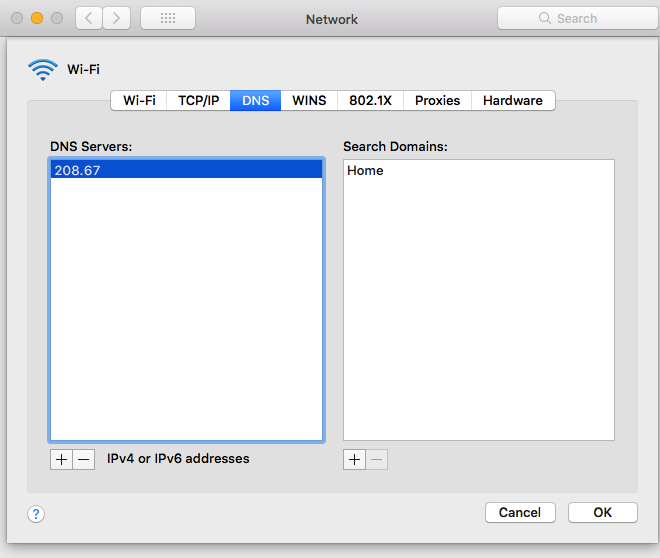
Switching to a different DNS server could potentially boost the speed of the network throughout your home. The easiest way to test your current DNS settings, is to use the Namebench application, which returns the address of three alternative DNS servers that could boost your network’s performance.
If you decide to switch to any of Namebench’s recommended servers, then:
- Navigate to ‘System preferences… > Network > Advanced.’
- Select the ‘DNS’ tab and click the little ‘+’ button.

- Enter the address of the DNS server that you want to switch to.
- Press the ‘Return’ key on your keyboard.
- Click the ‘OK’ button, followed by ‘Apply.’
Invest in a Wi-Fi Extender
As the name suggests, Wi-Fi extenders extend the signal from your router.
By strategically placing one or more Wi-Fi extenders around a building, you can strengthen the network in areas where you’ve been struggling with connectivity issues. If you position your extenders carefully, then you may even be able to coax some Wi-Fi into areas that were previously complete dead zones.
Invest in a Powerline Adapter
Powerline adapters transfer data over your house’s electrical wires, essentially functioning like an additional Ethernet cable.
You’ll typically purchase a powerline kit consisting of two adapters and two ethernet cables. The first adapter goes into a socket and into your router, and you then plug the second adapter close to the location where you’re struggling with Internet connectivity.
For the best results, you should attach your Mac to the second adapter using an ethernet cable, but if you want to make the network available to multiple devices, then you can always attach the powerline adapter to an additional Wi-Fi router.
Build your own parabolic reflector
If you fancy a project, then grab some tin foil, card, scissors and glue, and use a template to build your very own parabolic reflector. You can then attach this reflector to your router’s antenna to “bounce” the signal in the direction where you need it the most.


Add Comment