Occasionally it may be desirable to hide a folder on your Mac’s filesystem, either to keep it away from prying eyes or simply because it’s better not to be able to view some folders that could easily be removed or deleted by accident.
Finder doesn’t have any built-in ways to hide a folder (i.e. with a simple keyboard shortcut or from the Get Info window), and so the recommended method is within Terminal using the chflags command. This tutorial describes how to hide any file or folder in seconds.
Hide a Folder
Follow these steps to hide any folder or file:
1. Open Terminal from the Applications -> Utilities folder or using Spotlight
2. At the Terminal command prompt, type this followed by Enter:
-
chflags hidden <filename or folder>
The folder specified and all it’s contents will disappear from view in Finder, but it’s important to note that the files are still there and have not been deleted. If the filename contains spaces, you may need to put quotes around it, for example:
-
chflags hidden "~/Documents/Hide This Folder"
Rather than type in the whole file path, it’s also possible to enter the chflags command and then drag the file or folder into the open Terminal window which completes the file path for you. This just speeds up the process of entering the file path manually.

It may be necessary to enter the chflags command as the super user if you’re not already logged in as root. To do this, use the sudo command (the “super user do command”) and enter the root password when prompted.
-
sudo chflags hidden <filename or folder>
The chflags command can be used to change many properties about files. For more complete details on chflags, just type in man chflags at the command prompt to display the manual pages.
Unhide a Folder
Once your folder has been hidden, you might be wondering how to view it again. The simplest way is to use the same terminal command with the nohidden flag as follows:
-
chflags nohidden <filename or folder>

This makes the file reappear in Finder and resets its visibility back to normal.
![Automator Icon]() Using Terminal With Automator
Using Terminal With Automator
Every time you want to hide or unhide a folder, you could open Terminal and type in the chflags command. However, another perhaps more convenient method is to use Terminal to build an Automator workflow. This lets you create a small app that you can drag and drop files onto to hide, or even as a service to act on Finder items.
One approach to create an application is as follows:
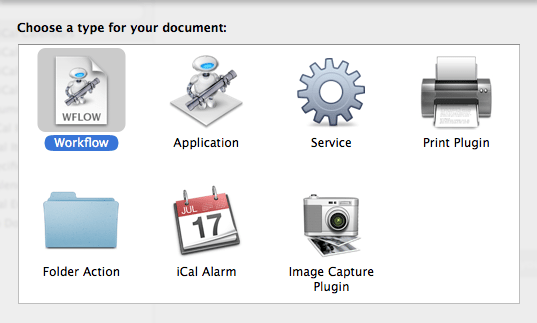
1. Open up Automator and choose workflow to create a new workflow

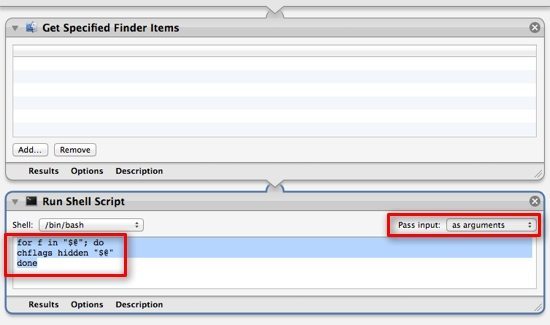
2. In the Actions pane, search for the Get Specified Finder Items item and drag it to the main window
3. In the Actions pane, search for the Run Shell Script item and drag it to the main window
4. In the Run Shell Script item, change the Pass input menu to as arguments
5. In the Run Shell Script item, enter the following script commands:
for f in “$@”; do
chflags hidden “$@”
done
Your workflow should look like this:

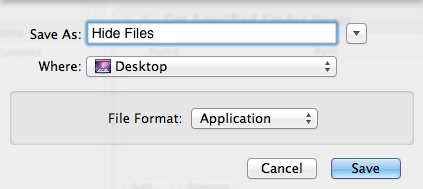
6. Save the workflow as an application and enter a suitable filename. Your new application will be saved with an Automator icon. You could also save it as a service which would be available in Finder’s Services menu item

7. Now just drag and drop any files onto the Automator app icon to hide them. To unhide them, obviously you can’t drag and drop files already hidden from Finder so you’ll have to unhide them manually with the chflags nohidden command from Terminal instead


Add Comment