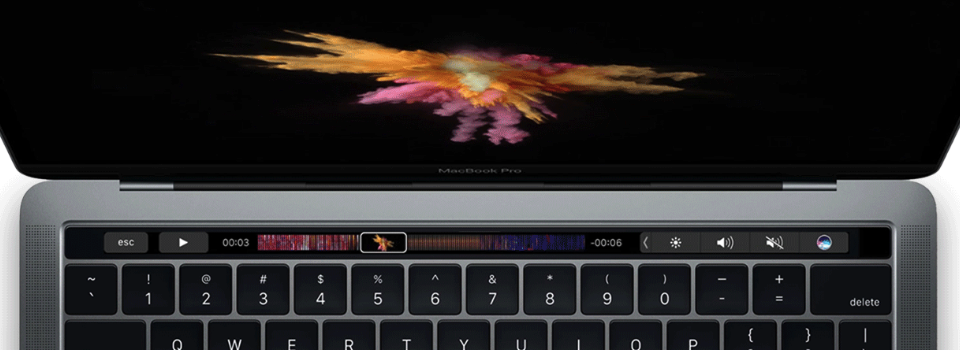
When Apple released the 2016 model of MacBook Pro, the Touch Bar was the feature that really grabbed the headlines.
If you own a MacBook Pro (15-inch, 2016) or later, or a MacBook Pro (13-inch, 2016, four Thunderbolt 3 Ports) and later, then you’ll have access to a thin touchscreen display that replaces the keyboard’s standard “Function” keys.
This touchscreen displays app shortcuts, system tools and functions, based on the current context. For example, if you’re viewing the “Mail” application then the Touch Bar will display shortcuts for composing, replying, archiving, and flagging messages.
The Touch Bar may update automatically to suit the current context, but when it comes to Mac users, one size rarely fits all. Perhaps you never use Mail’s “Archive” feature, but you love the “Snooze message” feature – wouldn’t it be nice if could swap that useless “Archive” button for a “Snooze” button?
In this article, I’ll show you how to customise the Touch Bar, by changing the shortcuts it displays within specific applications. Along the way, I’ll also share some tips for getting more out of the Touch Bar, including how to add and remove items from the Touch Bar’s Control Strip.
Customise the Touch Bar controls for specific apps
You can customise the controls that the Touch Bar displays within a specific application, and even within specific screens within a specific application. For example, when you’re creating a new event in Calendar you might want the Touch Bar to display shortcuts to edit the time and place, or to add new invitees. However, when you’re browsing your Calendar you might prefer shortcuts to view today’s events, or to switch to next month’s calendar.
To start, launch the application in question and create the correct context. For example, if you want to edit the controls that appear when you’re editing a new document in Notes, then launch Notes and create a new document.
Once you have the correct context, select “View > Customise Touch Bar” from the application’s menu bar. If the app doesn’t have a “View > Customise Touch Bar” option, then try looking in its “Settings” or “Preferences” menus instead. Just be aware that not every application currently supports Touch Bar customisation, particularly third party apps.

At this point, the customisation panel will appear, and the contents of your Touch Bar will start to wobble, indicating that they’re available to edit. You can now:
- Add a function. Find the control that you want to add, and then drag and drop it onto the bottom of the screen. That control should now appear in your Touch Bar.
- Remove a function. Drag the control up and out of the Touch Bar to remove it.
- Rearrange your functions. You can rearrange your controls, by dragging them left and right within the Touch Bar.
Once you’re happy with your edits, click “Done.”
Customise the Control Strip’s system tools
Traditionally, the Mac keyboard has consisted of a row of F1-F12 Function keys, which run along the top of the keyboard. These keys provide easy access to useful system tools, such as increasing and decreasing screen brightness, launching Mission Control, and changing the volume.

In the Touch Bar, all of these functions are located in the Touch Bar’s Control Strip. If you’re unhappy with the Control Strip’s contents, then you can add, remove and rearrange its controls, similar to how you edited the Touch Bar.
To customise the Control Strip:
- Click the “Apple” logo in your Mac’s menu bar.
- Select “Keyboard.”
- Select the “Keyboard” tab.
- Click “Customize Control Strip.” The customisation panel will now appear, and the buttons on your Touch Bar will wobble.
- To customise the full Control Strip, tap the “Expand” button (<).
You can now make the following changes:
- Add a tool. Find the control that you want to add, and then drag and drop it onto the Control Strip.
- Remove a tool. Find the tool that you want to remove, and then either drag the tool to the Trash can on the left of the Control Strip, or drag it upwards and then drop it onto the tool panel.
- Rearrange your tools. Select an item in the Control Strip, and then drag it to its new location.
Once you’re happy with your changes, click “Done.”
Get the Function keys back!
On the latest MacBook Pros, the Touch Bar has replaced the row of physical Function keys. If you miss the F1-F12 keys, then you can (temporarily) bring them back, with the tap of a button.
Press and hold your keyboard’s “Function (fn)” key until the “Fn” keys appear in the Touch Bar. You can now interact with the Function keys as normal.


Add Comment