iTunes is one of those applications which people either love or hate; besides accusations that it’s too bloated and tries to do too much, it’s nevertheless a pretty decent music player which contains a host of useful features. If you’ve taken the time to rate your entire music collection, iTunes is especially useful in creating Smart Playlists – these could be for example your top rated or 5 star songs, or even music that you haven’t played in a long time.
This tutorial shows you how to create Smart Playlists to get the most out of your music.
What is a Smart Playlist?
A Smart Playlist is very similar to plain old playlists in iTunes; however the principle difference is that you can set a bunch of conditions or rules that determine which songs (or videos, podcasts, TV shows or anything else) are included in the playlist. The playlist is constantly updated automatically and can therefore change over time, depending on the rules you’ve added.
There are a couple of Smart Playlists provided by default (such as Recently Added, Top 25 Most Played and My Top Rated) which can serve as the basis for other playlists you might like to create (you can just edit the rules they contain). Smart Playlists are indicated by a special cogwheel icon in iTunes to distinguish them from regular playlists.
It’s important to realise that deleting a Smart Playlist doesn’t actually trash the songs it contains – they’re still safely kept in your Music Library even when removed from the playlist. Smart Playlists can be incredibly useful, for example you could create one that contains all the unrated songs that you’ve never played, in order to prune them from your library.
We’ll start by looking at the default Top 25 Most Played to find out what a typical Smart Playlist contains.
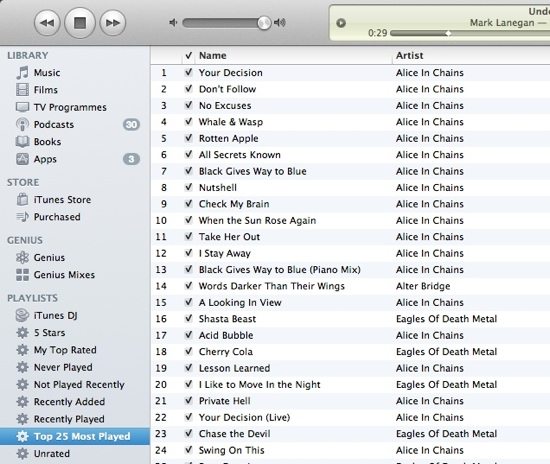
1. Open iTunes and in the left PLAYLISTS panel select Top 25 Most Played. The main playlist window displays everything that’s contained inside the playlist in sequential order (depending upon which column headers you have selected to sort by)
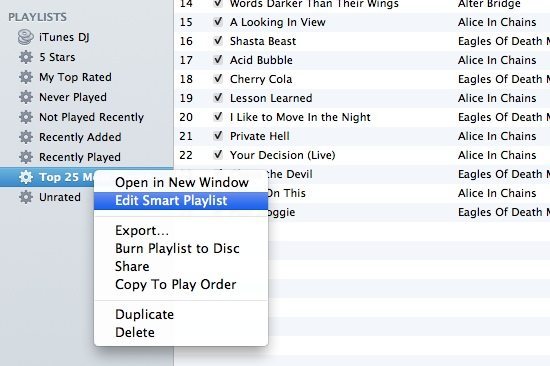
2. Right-click on the playlist itself and choose Edit Smart Playlist so you can view the items it contains
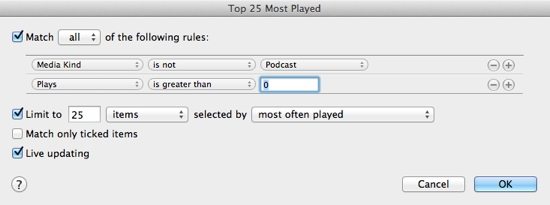
A new window opens displaying all the rules it uses. Those rules are usually quite simple – in this case it lists all items which aren’t podcasts but which have a play count greater than 0. Additionally, it’s limited to just 25 items selected by those played most often
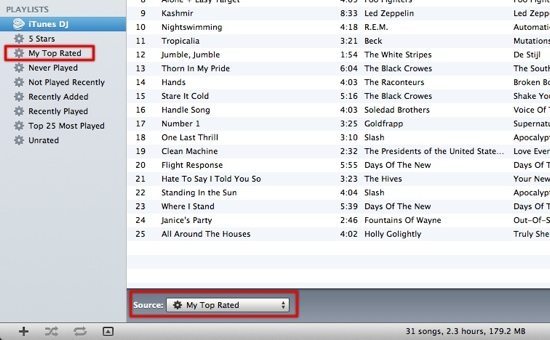
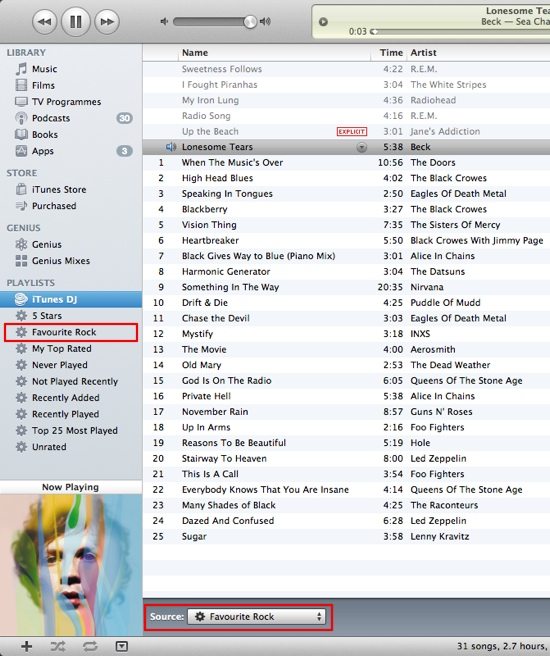
3. Now that you’ve seen what a typical Smart Playlist looks like, open the iTunes DJ and select any Smart Playlist in the Source drop-down list at the bottom of the window. Hit play and iTunes will play all the songs in that playlist in random order
Creating a Smart Playlist
Example 1: Five Star Music Added in 2012
The process of making your own Smart Playlists is extremely simple. In this example we’ll create a music-only playlist with items you’ve already rated 5 stars and that were added to iTunes in 2012.
Follow the steps below to get going:
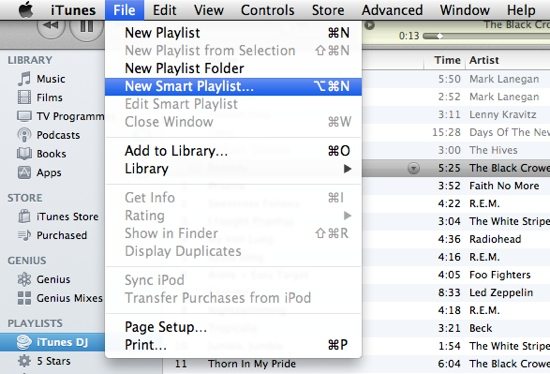
1. From the iTunes File menu, choose New Smart Playlist (the keyboard shortcut is OPTION + COMMAND + N)
2. The Smart Playlist window then opens with one blank rule as shown below, ready for you to setup all the conditions. In this case we want to match all of the rules we’re about to enter, so the first thing to make sure is that the checkbox at the top is set to Match any of the following rules
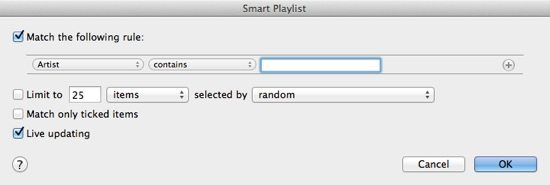
3. Across the middle of the playlist window there are some drop-down menus and files with 3 on each row. Click the first drop-down and the choice expands to a massive list of all the possible items – as you can see, pretty much every property of media is available. Change the first set of three to (Media Kind) (is) (Music) because we don’t want to include videos, podcasts or any other media type in this particular playlist

4. Next, we want to add another set of conditions, so hit the little + (add) button on the far right of the first row. In this rule, specify (Rating) (is) (*****) so that we only include our favourite songs in this mix
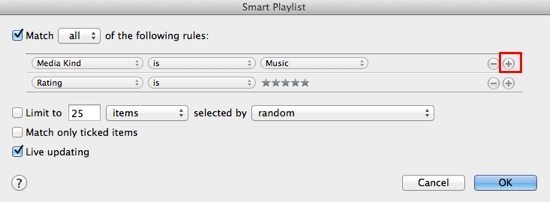
5. To include only songs that we’ve added to iTunes in 2012, add another rule and set it’s values as follows:
(Date Added) (is after) (31/12/2011)
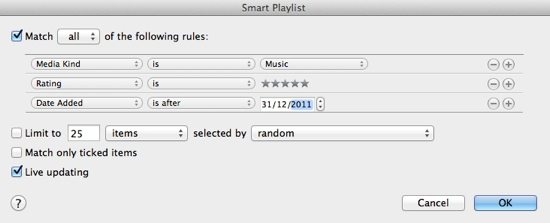
6. Now you can finish editing the playlist – make sure the Live updating checkbox is ticked – this ensures that the playlist is updated automatically so you never need to change anything. If you don’t check that option, the playlist will just be a static snapshot of your Music Library that satisfies all the rules you’ve set, although you can edit it later at any time and turn that option on. If you want to limit the number of items in the playlist, check the Limit to box and enter the maximum number of items you want, as well as the method used to sort the playlist (e.g. in random order)
7. Select the OK button to finally create the Smart Playlist. The playlist will be added to the PLAYLISTS section in iTunes with the default name untitled playlist.
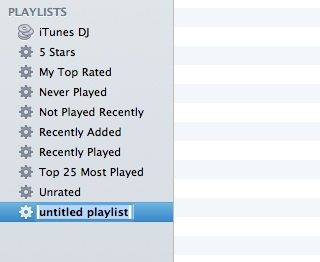
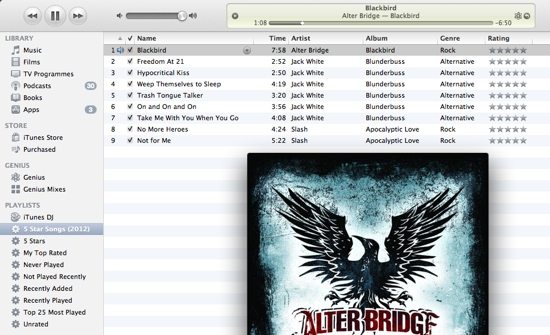
8. Rename your new Smart Playlist to something more meaningful such as 5 Star Songs (2012). All the items in it are now shown in the main iTunes window ready for you to play, burn to disc, or play from iTunes DJ
Example 2: Favourite Rock Not Played For 2 Weeks
The next example shows how to create a playlist with 4 and 5-star rock songs that haven’t been played during the last 2 weeks.
1. From the File menu, choose New Smart Playlist
2. When the new playlist window opens, ensure the first item is set to Match any of the following rules. Note that you could easily create a playlist that matches any rules – for example if you wanted just 5 star songs or specific artists
3. Add the following rules to the playlist by clicking any of the + buttons. You can also delete a rule with the delete (–) button.
- (Rating) (is in the range) (****) to (*****)
- (Last Played) (is not in the last) (2) (weeks)
- (Genre) (is) (Rock)
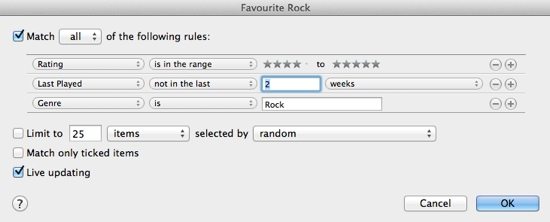
4. Now select the OK button and give your new playlist a name. The playlist is now ready to play and will constantly be updated by iTunes
It’s easy to create much more complex rules using Smart Playlists to filter and sort your music, so it’s a good idea to play around with the rules and see what’s possible!



Add Comment