When Apple released iOS 8, many people, especially those with 16 GB devices or with lots of apps and other content, found they were unable to install the update because it required 4 or 5 GB of free space.
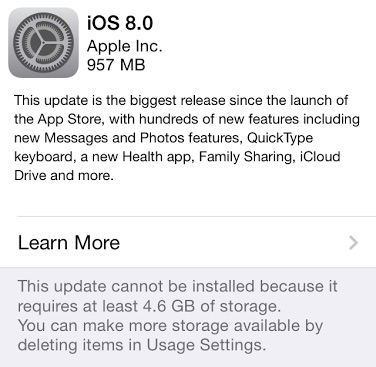
Why does the iOS 8 upgrade need so much free space, when the update is around 1 GB? The reason is that during the update process, lots of temporary files are created in order to be able to roll back if something goes wrong. After the installation, those temporary files are deleted, but it means that many people don’t physically have enough room on their device for the upgrade. This short guide shows you how to free up some room first.
Note that before you start deleting stuff from your device, it’s always worth doing an iCloud backup to ensure that nothing is lost forever!
To avoid the issue of insufficient space entirely, by far the simplest option is to connect your iOS device to iTunes and do the update, because doing it this way doesn’t require all that free space. Unfortunately, if you don’t have a computer or don’t want to use iTunes, read on…
Step 1: check what’s using the most storage
The first thing to do is to identify what is taking up the most space on your iPhone, iPad or iPod Touch. In this tutorial, I’ve used an iPad throughout, but the steps are exactly the same whichever iOS device you have.
You can check how much space everything uses by going to Settings -> General -> Usage -> Manage Storage, where you’ll see a list of the applications (and content) and an indication of the space they are taking up, largest first.
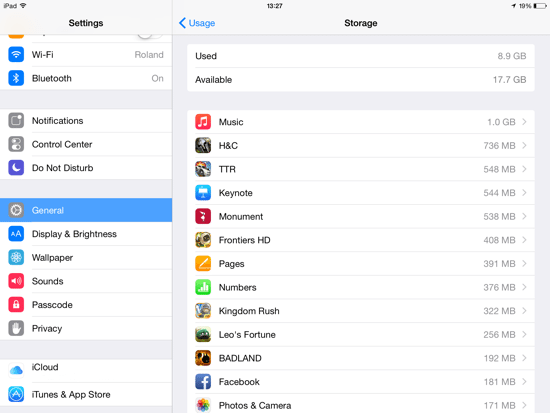
In the example, you can see that music is the worst offender in my case followed by a game called Heroes and Castles.
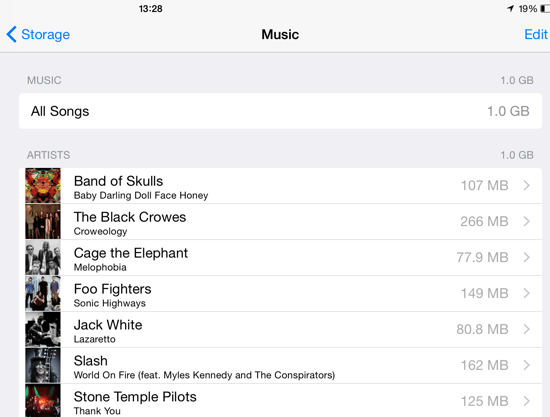
You can tap on any item to view more details – in my case Music then shows a list of all albums. For applications, you will see usually just see details for “Documents and Data”, which is often much smaller than the apps themselves.
Step 2: delete large apps
For gamers especially, some of those apps can be several GB in size. Many normal apps these days can even reach several hundred MB, especially since Apple increased the resolution of the iPhone which means apps often include several versions of graphics optimised for each device.
A minor note of caution however, is that before you delete an app it’s worth checking whether it has any documents or data stored locally on your device, as in that case when you remove it, your data will be lost. Many apps, such as Facebook and YouTube, will require that you login again when you reinstall, so make sure you have those user names and passwords handy.
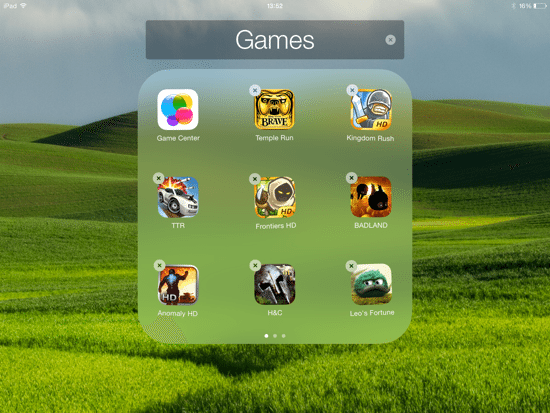
Find the biggest applications on your device and delete them (i.e tap and hold on the home screen then hit the ‘x’ button that appears, or just select Delete App from the Storage menu in step 1).
Once you’ve deleted an app, you can just download them again later on from the App Store. Many apps and games these days store their data (like documents, settings or game progress) in iCloud, which means that when you re-download the app your data will still be intact.
Step 3: delete music, videos and photos
After you’ve removed the worst offending apps, the next step is to delete any music, videos and photos that you have stored locally on your device.
Open the Videos app and delete local versions of Movies, TV Shows, and Music Videos by tapping the Edit button then hitting the small ‘x’ that appears on each item. You can download these items again after the upgrade.
For personal videos that you’ve made (i.e. that you did not download from iTunes) you should connect to your Mac via USB cable and then copy the files into a folder temporarily (using a tool such as Image Capture – more details on that later).

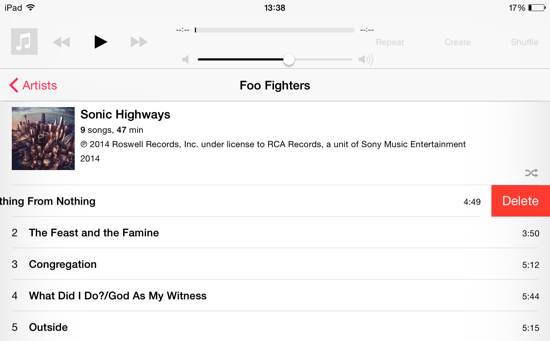
Similarly, open the Music app, select any local content you have in there, and swipe left to show the delete button, and then confirm. It’s a bit of a slow process if you have thousands of songs, however. After you have deleted your music, it’s worth knowing that you could in future listen to all your iCloud music just by pressing play, i.e. you don’t really need to download songs unless you are planning to listen to them when you don’t have a network connection.
Unfortunately, it’s not possible to delete an album one at a time (or all music at once, for that matter) in the Music app, though you could do this in iTunes by unchecking the Sync button.
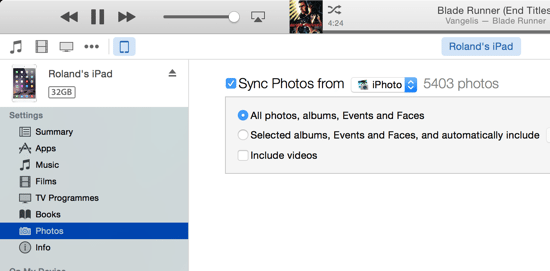
If you have copies of photos in iPhoto on the Mac, you may also like to connect your iOS device to iTunes and synchronise everything. Ensure your device is visible in iTunes, select the device’s icon in the toolbar, and in the left hand panel select Photos. You’ll then have the option to Sync Photos in the main window, where you can choose the desired photos. This means that all your photos in iOS will be copied to iPhoto. You can always export them at a later date and copy them back onto your iPhone or iPad.
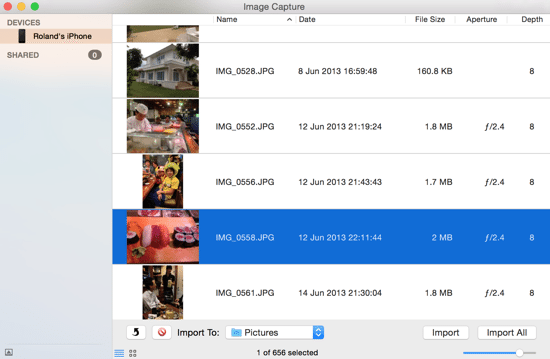
There is another simpler (and very fast) way to export photos from your iOS device onto a Mac using a built-in app called Image Capture (it treats your device like a camera):
- Open Image Capture from the Applications folder, or just type it into Spotlight
- Connect your device to your Mac using a USB cable
- Select a folder from the menu (Pictures is the default) or even choose iPhoto, and then choose Import All (or just select individual photos and click Import)
This will copy the photos over, enabling you to then copy them back again using iTunes later on (or one of many third party synchronisation apps).
Check out our earlier article which describes loads of different ways to copy photos from your iOS device onto your Mac.
Another simple option is to use a cloud-based service like Dropbox. You can upload all the photos on your device, and then delete them from the native Photos app. If you already use iCloud, bear in mind that it only synchronises a limited number of photos to the Photo Stream, so if you just delete all your photos, you may find that some are not available online (this will change in future when iCloud Photos is officially available, as now it’s still in beta).
Upgrade to iOS 8
If you have managed to free up enough space on your device, you should now be able to go ahead and install iOS 8.
Once successfully completed, you can then reinstall the items that were previously deleted.
For Apps, open the App Store and download them again (once installed, you may need to re-enter user names and passwords).
For Music and Videos, the iTunes store will let you download. But for personal videos that you copied to your Mac or PC, you’ll need to connect your device by USB cable (as that’s the fastest way), and copy the items back manually.
Pictures stored in iCloud should still be accessible as before, but to restore other pictures, either copy them back from third party apps (like Dropbox) or use iTunes to sync the photos back.
We hope that you enjoy using iOS 8 – there are lots of great new features and it’s certainly worth the time and effort. As always, just make sure that you backup everything first just in case something goes wrong.
Note that you can also find more resources online at the Apple Support website.



Add Comment