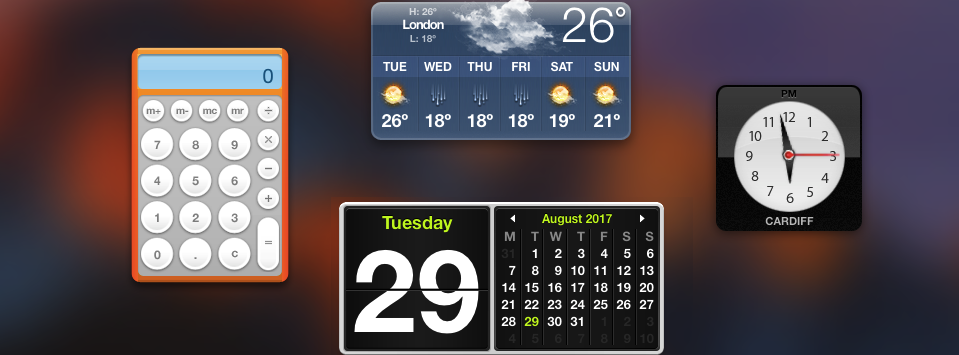
The Dashboard is one of those features that Mac users either seem to love and use all the time, or never use at all – especially since a lot of the information previously supplied by Dashboard widgets is now more readily available via macOS’ Notification Centre.
If you’re not a fan of the Dashboard, then it can be seriously annoying when you hit the wrong keys and trigger the Dashboard by accident, plus having unused Dashboard widgets hanging around in the background will have a negative impact on your Mac’s performance.
If you don’t really “get” the point of the Dashboard, then in this article I’m going to show you how to disable it. If you’re running a newer version of macOS, then your ‘System preferences’ contains a handy option that lets you toggle the Dashboard on and off with a single mouse click, but if you have an older version of macOS then this option is frustratingly absent, so I’ll also be showing you how to disable the Dashboard using Terminal commands.
And, just in case you want to give the Dashboard a second chance, I’ll be showing you how to change the Dashboard, so instead of a separate space in Mission Control it appears as a transparent overlay with widgets that “float” above your Desktop.
Disabling Dashboard from the System Preferences
If you have an up-to-date version of macOS, then you should be able to remove the Dashboard from your Mac’s System Preferences:
- Click the ‘Apple’ logo in your Mac’s toolbar.
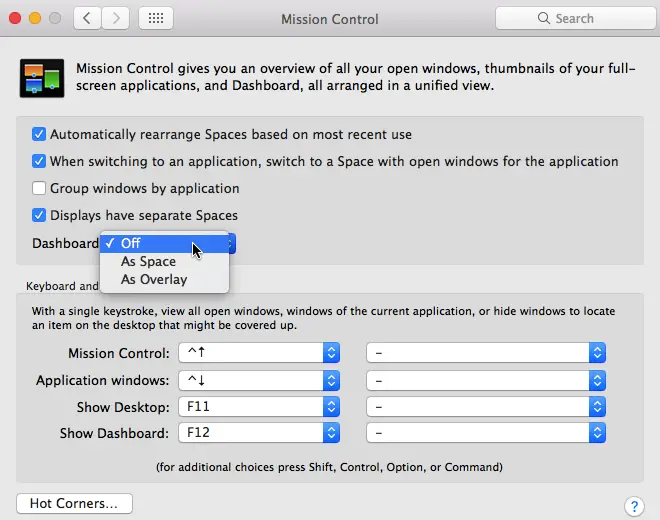
- Select ‘System Preferences > Mission Control.’
- Open the ‘Dashboard’ dropdown, and set it to ‘Off.’

Now, the next time you accidentally hit the keyboard shortcut that would usually launch the Dashboard (‘fn + F12’ by default), nothing will happen.
If you change your mind and want to re-enable the Dashboard at any point, then simply navigate back to ‘System Preferences > Mission Control’ and set the ‘Dashboard’ dropdown to ‘As Space.’
Disabling Dashboard from the Command Line
If your ‘System preferences > Mission Control’ menu doesn’t contain a ‘Dashboard’ dropdown, then you can still disable the Dashboard using your Mac’s built-in Terminal:
- Open a Finder window and navigate to ‘Applications > Utilities.’
- Double-click to launch the Terminal application.
- Copy/paste the following command into the Terminal:
defaults write com.apple.dashboard mcx-disabled -boolean YES; killall Dock
- Press the ‘Enter’ key on your keyboard.
Try pressing the shortcut that usually activates the Dashboard, and nothing should happen. Even if you navigate back to your Mac’s ‘Applications’ folder and double-click the Dashboard app, the Dashboard will refuse to open.
If you have a change of heart and want to start using the Dashboard again, then you can re-enable it by issuing another Terminal command:
- Open the Terminal window.
- Copy/paste the following command into the Terminal:
defaults write com.apple.dashboard mcx-disabled -boolean NO; killall Dock
- Press the ‘Enter’ key.
Switch to a transparent overlay
It’s possible that you may be a fan of the Dashboard’s functionality, but aren’t a fan of its presentation – being transported away from your Desktop and into a completely different area of the system can be jarring. If this is the case, then you may want to experiment with using the Dashboard as a transparent overlay.

When the Dashboard is presented as a transparent layer, the contents of your Desktop remain visible, which is ideal if you need to refer to something on your Desktop while interacting with your widgets. For example, if you have a document containing a list of numbers that you need to input into the Dashboard’s calculator widget, then this transparent layer saves you from having to keep flicking between the Dashboard and the Desktop.
To try out the Dashboard as a transparent layer:
- Navigate to ‘System Preferences > Mission Control.’
- Open the ‘Dashboard’ dropdown, and select ‘As Overlay.’
You can continue to launch the Dashboard using exactly the same shortcut, but exiting the Dashboard is slightly different: you’ll need to click a transparent area of the Dashboard, and macOS will return you to the regular Desktop.


Add Comment