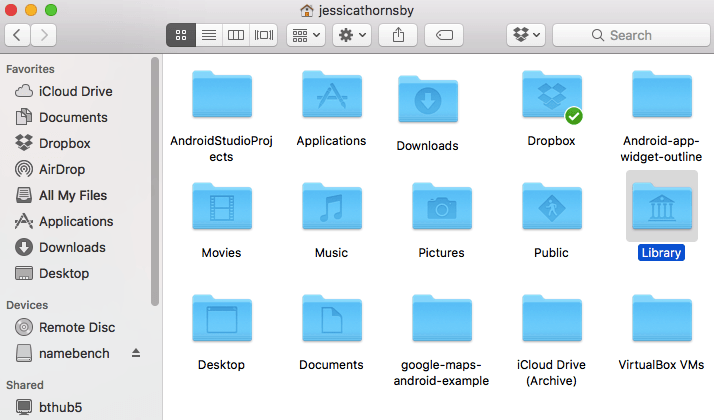
Your Mac’s Library folder contains important personal settings, data, and even support files that many applications require to run, so hiding this folder is a useful way of preventing users from deleting or moving crucial files by accident. However, the fact that the Library folder no longer appears in the ‘Home’ directory by default has the potential to confuse and frustrate many seasoned Mac users.
While you generally won’t need to access the Library folder on a day-to-day basis, occasionally you may require access when you’re troubleshooting a misbehaving app or performing certain maintenance tasks.
The good news is that the Library folder is exactly where it’s always been – it’s just hidden.
If you do require access to the Library folder, then there’s a several ways that you can coax it out of hiding, depending on whether you require temporary access, or something more permanent.
Gaining Temporary Access to the Library Folder
Since it’s unlikely that you’ll need to dip into the Library folder on a daily basis, it may make sense to access this folder temporarily.
All of the methods described below will open the Library in a Finder window, ready for you to make whatever changes you want, but as soon as you close that Finder window, the Library will go back to being hidden. This approach can be particularly useful if you share your Mac with other users and want to ensure they won’t be able to go poking around in the Library, potentially making irreversible changes to your Mac.
To gain temporary access to the Library folder:
- Open a ‘Finder’ window.
- Select ‘Go’ from the toolbar, followed by ‘Go to Folder.’
- In the window that appears, enter ~/Library.
- Click ‘Go.’
Alternatively, you can open the Library folder using a keyboard shortcut:
- From your Mac’s ‘Desktop,’ press the Command+Shift+G keys.
- In the subsequent ‘Go to Folder’ dialog, enter ~/Library.
- Click ‘Go.’
The final method is to use a Terminal command. You can open your Mac’s Terminal application by navigating to ‘Applications > Utilities > Terminal.’
Type the following command into the Terminal:
open library
Then, press the ‘Enter’ key on your keyboard, and your Mac will launch a new Finder window that’s already displaying the contents of your Library folder.
Permanently Reveal the Library Folder
If you suspect you may need regular access to your Library, then there’s several ways that you can make this folder permanently visible.
The first method is to use a Terminal command, so open the Terminal and type the following:
chflags nohidden ~/Library/
Then, press the ‘Enter’ key.
If you want to hide the Library folder at any point, then open the Terminal and run the following command:
chflags hidden ~/Library
Alternatively, you can permanently reveal the Library folder by:
- Opening a ‘Finder’ window.
- From the toolbar, select ‘Go > Home.’
- Select ‘View’ from the toolbar, followed by ‘Show View Options.’
- In the subsequent menu, select the ‘Show Library folder’ checkbox.

To hide the Library folder again, repeat the above steps, but this time deselect the ‘Show Library folder’ checkbox.
Once you’ve made the Library folder visible by default, you can access it using any of the following methods:
- Open a ‘Finder’ window, navigate to your ‘Home’ folder and double-click to open the Library folder.

- Open a ‘Finder’ window, select ‘Go > Go to Folder…’ Enter ~/Library and then press the ‘Go’ button.
- Open a Terminal and run the following command: open ~/Library/


All of these pale in comparison to simply holding down the option key when selecting the Go menu.