The menu system on the Mac works very well, however there are times when it can be a real pain to have to move your mouse all the way to the top of the screen just to access an application’s menus. On a laptop, this might not seem like such a big deal, but anyone that has a 27-inch display will surely agree that the menu bar could be made a tad more accessible. So to avoid repetitive strain injury and access an application’s menu bar from anywhere, just install this handy little utility called MenuPop.
 About MenuPop
Links: Apple website, Binary Bakery website
Price: £2.99
Some applications become so useful that you wonder how you ever did without them. This is certainly the case with MenuPop which makes using your Mac a lot easier. MenuPop can be downloaded from the App Store for the paltry sum of £2.99 (or from the Binary Bakery website for $4.99), and there’s also a 14-day trial version available on the website.
But how does it work? Once you’ve installed the application you’ll have access to all of it’s settings – for example you can choose the popup menu font sizes, as well as a hot key combination (or a mouse button combo) to display the app’s menu vertically at your cursor location. In other words, you don’t need to move to the menu bar at the top of your screen.
Installation
From the App Store, installation is a breeze – click on the price and enter your Apple ID to continue as normal. To remove the application is just as straightforward – go to Launcher and hold down the OPTION key until the icons wiggle. When the white cross inside a black circle appears, click the cross on the MenuPop icon to completely remove the app.
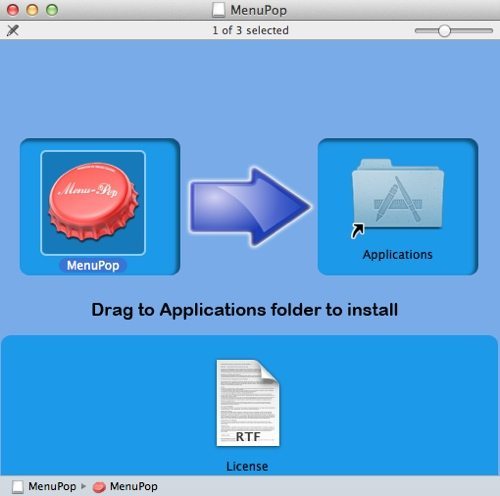
Alternatively, installing from the MenuPop website downloads a DMG file to your Mac. Double click the file and follow the on-screen instructions. You’ll be prompted to drag the MenuPop icon into your main Applications folder. Once you’ve done that, installation is complete.
Configuration
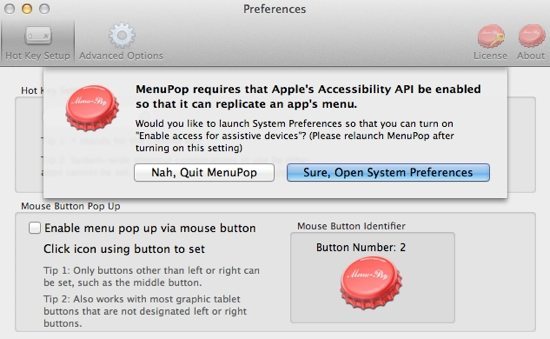
Once MenuPop is installed, find the icon in your Applications folder (or just use Spotlight) and double-click it. When it opens for the first time, you’ll be prompted to change a system preferences setting as shown below. Choose the option entitled “Sure, Open system Preferences” which closes MenuPop and opens up the correct settings window.
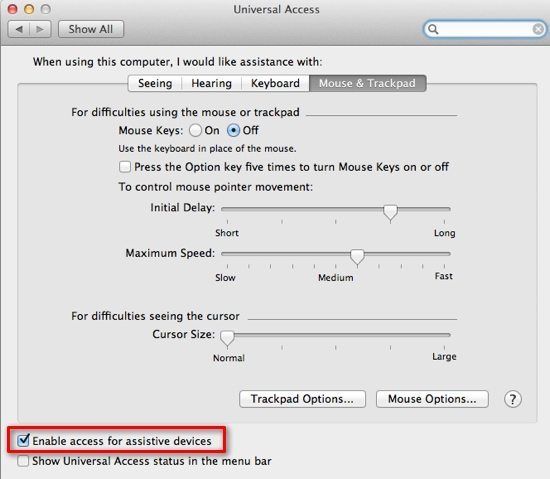
Once the Universal Access settings have opened, make sure you’ve selected the option at the bottom left of the window called Enable access for assistive devices. Once you’ve done this, close System Preferences and relaunch MenuPop.
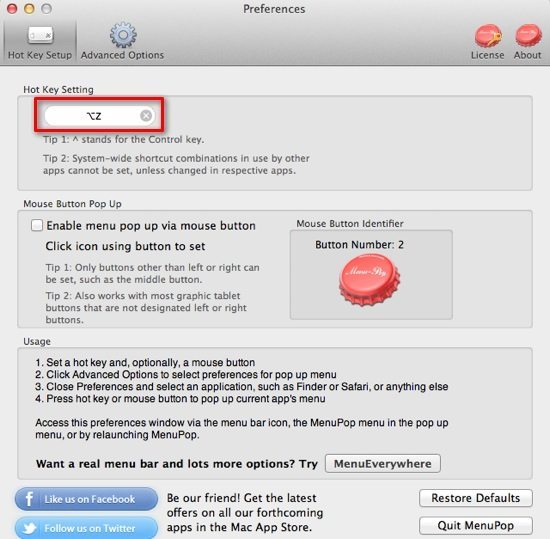
When MenuPop reopens, select the Hot Key Setup tab and make a note of the shortcut setting which will be used to activate the popup menus. The default is OPTION + Z but this can be changed by entering a new one under the Hot Key Setting section. If you would rather use a mouse button, check Enable menu pop up via mouse button and choose the desired mouse button on the right-hand side by clicking the bottle top icon.
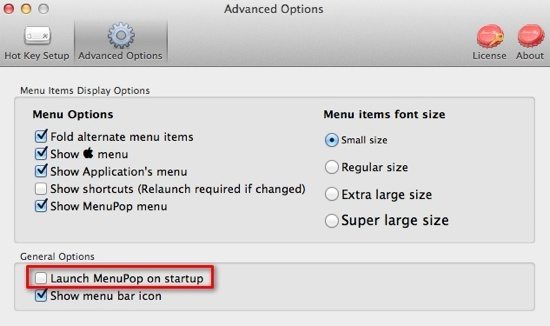
Next, go to the Advanced Options tab to choose which popup menu items will appear, as well as the font size. It’s also a good idea to check Launch MenuPop on startup under the General Options at the bottom. MenuPop must be running to use its popup functionality, so having it run on startup just means that you won’t have to remember to launch the app every time you want to use it.
Using MenuPop
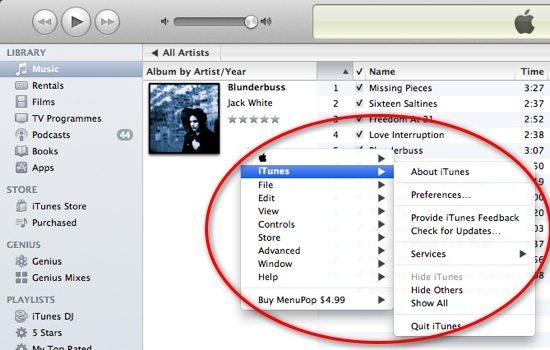
Once you’ve set the relevant options, it’s now ready to use (you’ll also see its icon in your menu bar if you’ve ticked that option in its settings). Open any app on your Mac (such as iTunes, Safari, or Mail) and use the hotkey that was defined earlier. You’ll notice that the application’s menu bar that usually resides at the top of the screen now pops up vertically at your cursor location, as shown below. Now you’ve set it up, there’s nothing more to do but enjoy the convenience that it offers…


Add Comment