Perhaps the most important thing to remember for anyone that uses a Mac regularly is to perform regular backups. The importance of this cannot be underestimated, because even though Mac hardware is generally pretty reliable, disk errors and even complete failures do occur from time to time.
This article outlines 5 simple ways to backup your Mac, to ensure that your data remains as safe as possible.
Backup Strategy
It’s important to realise that one backup is never enough. You might think it would suffice, but most dedicated backup aficionados make two or even three sets of backups and always store one of these offsite. Imagine the worst case scenario if someone stole your MacBook Pro and the backup disk attached to it – the whole point of backing up is to be able to recover your data in such an unlikely scenario. So if you’ve got backup disks lying around at home, make sure you store them somewhere physically separate from your computer.
Another thing to think about is what kind of backup media to use. Optical disks are cheap and readily available but you might need quite a lot of them especially if you have a large hard disk on your Mac. Most people opt for external hard disk drives (USB or FireWire ones) as they’re relatively inexpensive and can store vast quantities of data.
An important point to realise is that if you use optical disks such as CDs and DVDs, you should regularly retire them. In other words, every so often, make a fresh copy of your data and burn to new disks, and store the older ones somewhere safe. Optical disks can also degrade over time, although they can normally hold data reliably for decades.
How to Backup
![Time Machine Icon]() 1. Time Machine
1. Time Machine
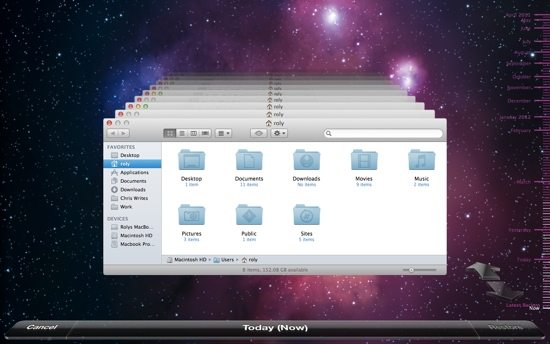
By far the simplest way to backup your content is with the Mac’s Time Machine application that has been bundled with every Mac since Leopard was released in 2007. Time machine is designed to be very simple to use and nearly invisible. In fact, all you need to do is plug in an external drive and configure Time Machine to use it for backups. From then on, it makes hourly backups of the changes to your hard disk for the last 24 hours, consolidated daily backups for the last month, and weekly backups for everything older than that. Time Machine also features a very intuitive user interface that lets you zoom back in time to any date you want to restore individual files and folders from. Once your Time Machine disk is full, it starts deleting the very oldest weekly backups first to make more room.
Once Time Machine is up and running, there’s not really anything you need to do except let it continue its backups quietly running in the background. An important point to realise is that Time Machine doesn’t make an absolutely perfect copy of your hard disk – rather, it backups up your documents and files and the most important system files. It won’t let you boot from a backup disk either – in the event of a catastrophic failure you’ll need to boot from a Mac OS install disk if you have one (or Lion’s recovery partition) and then restore using your Time Machine disk. The process is fairly straightforward and will get you back up and running relatively quickly.
Here’s a quick rundown on the basics of Time Machine.
1. Open Time Machine (from the Dock, Applications folder or Spotlight) and enable it using the main slider on the left
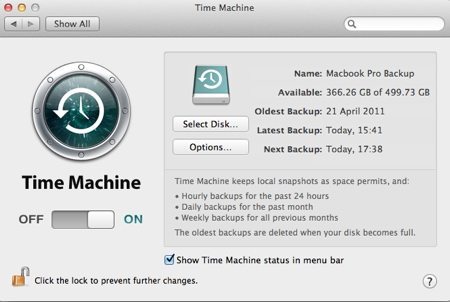
2. Hit Select Disk if you haven’t already been prompted (such as when you plug in a new external USB drive)
3. Choose the disk you want to use as your Time Machine disk, or setup a Time Capsule device then click Use Backup Disk
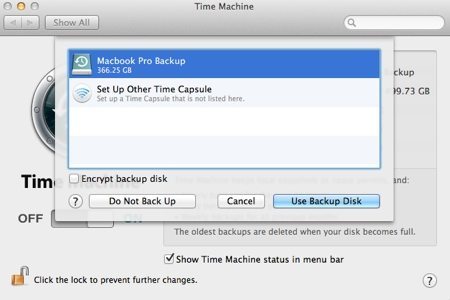
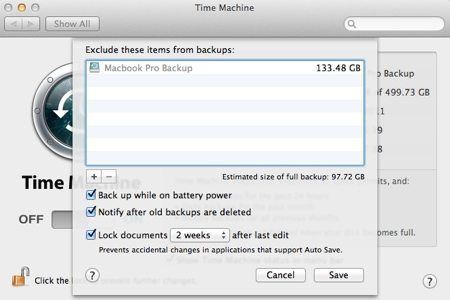
4. Select Options to open additional Time Machine preferences, and choose any items that you want to exclude (normally the backup disk itself) as well as extra preferences to lock documents and whether to show Time Machine status in the menu bar
5. Now just sit back and let Time Machine do its magic. There’s nothing else you need to do until you want to restore a document from a backup, or completely restore your Mac’s files and applications on boot up. In the former case, open Finder and click on the Time Machine icon to open the list of files by date and time. Likewise in Mail, just click on the Time Machine icon and all the mail backups will be conveniently displayed
2. Clone a Drive
A full clone of your hard drive is often the ideal backup option, as it lets you boot straight away without having to restore (and uncompress) files and applications. If you regularly clone your drive, it’s certainly the fastest way to get back up and running. A few methods to clone your Mac’s hard disk are as follows:
![]() Disk Utility
Disk Utility
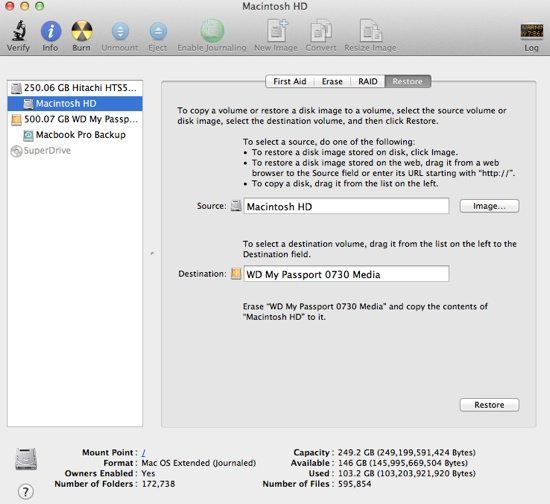
Even though applications such as Carbon Copy Cloner (see the next section) can create a clone of your Mac’s hard disk, it can just as easily be done using the Disk Utility tool which is located in the Applications -> Utilities folder:
1. Open Disk Utility from the folder mentioned above or from Spotlight, and go to the Restore tab
2. In the left panel, drag the source disk that you want to copy into the Source box in the main window
3. In the left panel, drag the destination disk that you want to use into the Destination box in the main window
4. Click the Restore button shown on the lower right. Your entire Mac’s hard disk will now be copied to the disk you’ve selected, which can be used as a full and complete copy of your Mac. When you want to restore everything using the cloned image you’ve just made, reboot your computer and hold down the Option key, then select the Recovery HD to get to the boot screen. Then, choose Disk Utility and follow the same procedure as above but instead use the cloned disk as the source, and your Mac’s hard disk as the destination
![]() Carbon Copy Cloner
Carbon Copy Cloner
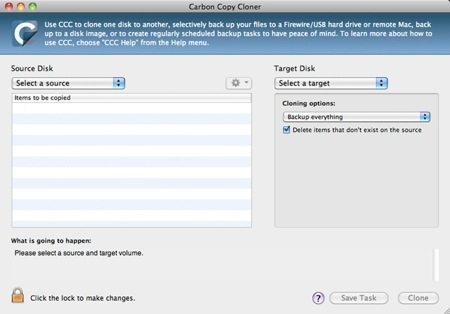
Carbon Copy Cloner is a powerful application that overcomes many of the limitations of Time Machine (for example, the relative lack of control over what’s backed up and its inability to exclude certain file types or files over a certain age). Carbon Copy Cloner is free software that relies on donations, so you can try it and see whether you like it first.
The advantages it has over Time Machine are:
- It creates a bootable backup of your hard drive for fast system recovery
- It uses an ordinary file system which can be browsed in Finder to find specific files
- It can backup to any drive attached to a Mac on the network
- It has more advanced scheduling and exclusion capabilities than Time Machine
3. Online Backup Solutions
There are several cloud-based backup solutions on the market, and while Apple’s own iCloud doesn’t yet allow full system backups to the cloud, it’s surely only a matter of time before more advanced functionality is available. In the meantime, several of the more popular solutions available today are detailed below. On the whole, online backup solutions are inexpensive and work well, but you may need a speedy Internet connection to use them to their fullest potential.
![Dropbox Icon]() DropBox
DropBox
DropBox is an application that must be installed on your Mac, which provides online cloud-based file storage for all your content such as documents, music and movies – in fact anything that you want to keep safe online. Once the app is installed you can select the items to be backed up and synchronised, plus if you have an iOS or Android device you can access your content from there too (once you’ve installed the app), as well as designate shared folders that anyone can access.
The service is free for just 2 GB of storage, or $99 per year for 50 GB and the top tier is $199 per year for 100 GB – this amount should be more than enough to hold your most important files.
![Backblaze Icon]() Backblaze
Backblaze
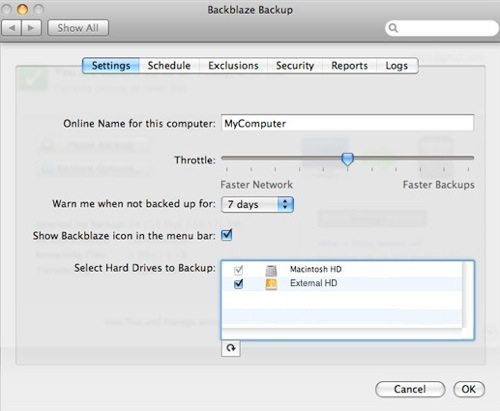
Backblaze is an extremely inexpensive online backup solution that provides unlimited storage for just £4 per month. Create an account, install the application and choose what you want to backup and when. Backblaze has lots of customisable options, and can exclude certain file types such as system files.
4. Third-Party Backup Apps
There are also several third-party backup and synchronisation apps in the Mac App Store. Those which offer proper backup facilities (not just simple file synchronisation) tend to be more fully featured and can do more than merely keep two sets of files in sync. A few of the apps are described below.
![]() Get Backup Pro
Get Backup Pro
Price: £10.49
Get Backup Pro is able to create encrypted backups and synchronise folders across multiple computers. It has the ability to set schedules (for example daily, weekly or monthly), and perform full, incremental or versioned backups. It’s simple to use and makes the backup process fairly easy.
Details: Apple website
![]() Intego Backup Express
Intego Backup Express
Price: £10.49
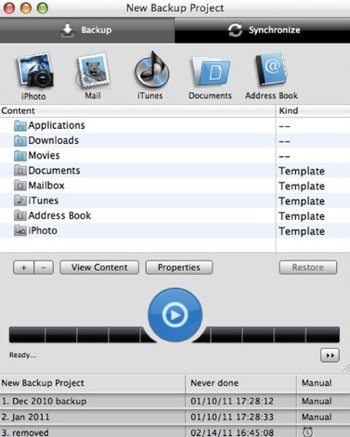
Intego provides full and incremental scheduled backups from your Mac to all manner of connected disks and other media, as well as simple synchronisation of folders or disk volumes, as well as all the usual options to exclude various folder locations.
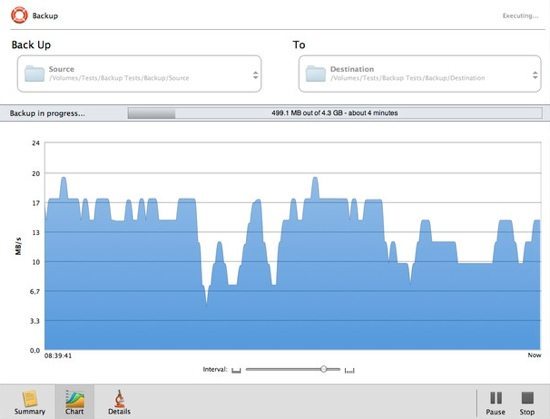
Details: Apple website
5. Manual Backup
The last (and least effective) way of backing up your Mac is to do it manually, by copying the relevant files and directories from your computer to another drive – either an external disk or USB stick, or to a network location. If your data rarely changes then it would be easy enough just to copy the relevant files once a day or every week, but you’re prone to forget and it could be quite time consuming if you want to copy lots of individual folders but exclude certain kinds of date ranges.
Since there are so many good (and free) tools available (not least Time Machine which is built into Mac OS), there’s really no reason to manually backup your files unless it’s just an added precaution! Rather than manually backup, check out some of the simple synchronisation applications available for the Mac – essentially the same thing as manually copying files, but they can save you the hassle of remembering to do it.





Over the years I have used about every backup method, some for different purposes than others.
The one thing we learned dealing with clients (and yes, even ourselves) is that backup seldom happens reliably unless it is AUTOMATIC!
That’s why we started the push some time ago to move towards online backup; not only does the backup happen, but it also gets the backup OFF SITE, an important consideration that has come home to roost big time in recent years with all of the natural disasters that previously seemed much more rare.
Best,
Roger.