Hard disks inevitably fill up over time, and a higher capacity drive just means that you’ll find more ways to fill it. These days it’s possible to buy a MacBook Pro with a 750 GB hard disk, but even that can fill quickly if you have lots of media such as movies, music and photos. As an example, a typical 1 hour TV show downloaded in iTunes takes up around 1 GB, and so the entire 6 series of Lost takes up well over 100 Gigabytes on your hard disk.
Besides upgrading to a larger disk, the easiest way to free up some space is to remove and archive some of the stuff that you don’t really need.
How to Check Available Disk Space
To check how much space you are using for different categories such as audio, movies, photos and applications, select About This Mac from the Apple Menu, click the More Info button followed by the Storage tab. A summary of each category is shown, which may help you to decide how best to reclaim disk space.

1. Empty The Trash
The most obvious and easy way to free up some space is to empty the Trash. Remember that individual applications such as iMovie, iPhoto and Mail each have their own Trash, so empty those frequently too. There’s no need to keep your Mac’s Trash can full, especially if you make regular backups of your files. In Mail, trash and junk emails can be automatically deleted by setting the relevant options in preferences.
2. Uninstall Unused Applications
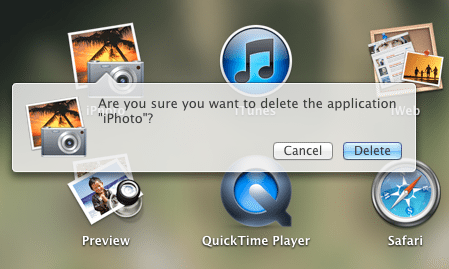
Applications can take up large amounts of space. For example, Pages is 266 MB and iPhoto a whopping 1.1 GB. Uninstalling applications in Mac OS X couldn’t be simpler – just delete the application by moving its icon to the Trash. In Lion it’s made even easier – open Launchpad and hold down the Option key until the icons wiggle, then just click the small white “x” icon that appears next to any app that was installed from the App Store. Note that there may be a few preferences files left behind by uninstalled apps, most of which can be found in the ~/ Library / Preferences folder and safely deleted.
3. Find and Remove Large Files
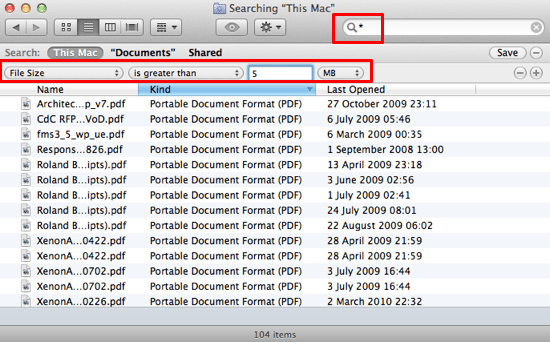
To find particularly large files on your Mac’s hard disk, the quickest way is to use Finder:
- Open a new Finder window
- In the search field just enter a space asterisk this will ensure that all items are included
- Click on the little + icon located just below the search field
- Change filter #1 to File Size. Click on the drop-down menu and choose Other. Locate the File Size item and hit OK
- Change filter #2 to is greater than
- Enter the size you want to search for in the adjacent text field (for example 5 MB) and change filter #3 to either MB or GB as appropriate
Finder displays all the files matching the criteria you’ve entered. You can also choose Save to create a smart folder of such items and add it to Finder’s sidebar, so you can find large files more quickly next time.
When you’ve located the largest files on your Mac’s disk you might choose to compress, delete, or copy them to an external drive.
4. Empty Application Caches and Preferences
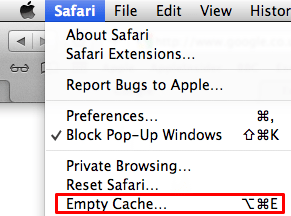
Some applications use caches to store various bits of information, but these files can grow very large over time and consume valuable disk space. A typical example is Safari which has an Internet cache to save it re-downloading content from frequently visited websites. Most applications store their caches in one of the following two folders:
- The systemwide cache folder at // Macintosh HD / Library / Caches
- Your local user’s cache folder at <Your Home Folder> / Library / Caches
Cache files can be safely deleted, because an application will just create a new one when needed.
5. Delete Old and Unwanted Media Files
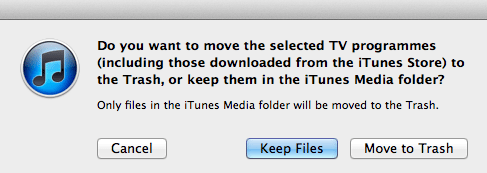
Pruning your media libraries is a great way to save space. Start by checking if there are any duplicates in iTunes (choose Display Duplicates from the File menu) and then delete any you don’t want. In iPhoto, keep only your best pictures and delete the ones that you really aren’t ever going to view again, or simply move them to an external disk or burn to DVD.
In iTunes, create a smart playlist to show all the old content that you haven’t played in aeons (or items you’ve rated as 1 or 2 stars) and decide which ones to keep. Songs typically take up several megabytes each, so it’s possible to free up quite a lot of space this way.

It’s also possible to use Finder to located old or particularly large media files.
6. Compress and Archive Old Files
Any files you’ve identified as too large or old can be deleted or compressed. Compressing a file will normally reduce the disk space it needs, so you might then decide to keep it on your hard disk or move to external storage. Either way, it’ll free up some space depending on the type of file – for example, compressing text documents can reduce the space they take up considerably, whereas images and movies are usually compressed already so you won’t gain much by trying to reduce them in size even further.
Fortunately, Mac OS X already includes the Zip built-in file compression utility:
- Select the files and folders you want to compress
- Right-click and choose Compress Items to create a Zip file archive
7. Archive Emails and Remove Attachments
The number of emails in Mail and the disk space they need can grow enormously over time, especially because mails with attachments can be very large indeed. Old emails can be archived and attachments removed to save space.
To archive an email:
- Select the email(s) you want to archive
- Right-click and choose Archive
The selected emails are moved to the Archive mailbox for the account in use.
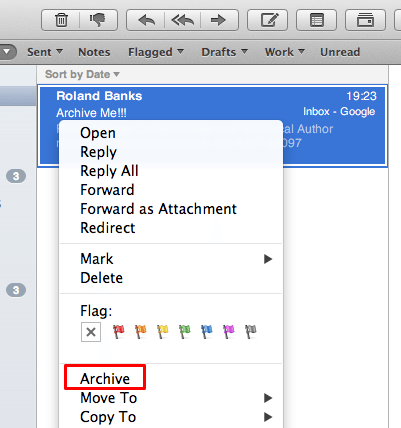
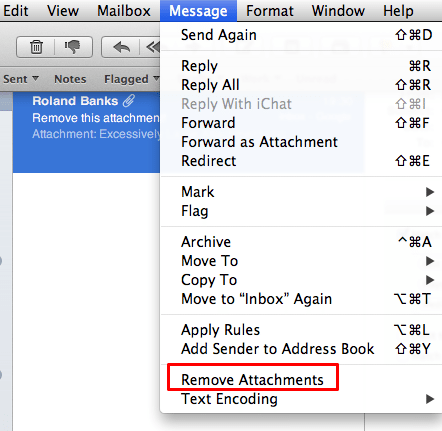
To help keep the size of your mailbox as small as possible, remove attachments from messages and save them to local folders on your Mac, which can then be dealt with in the normal manner (i.e. compressed, deleted, or moved to an external disk).
To remove attachments from email:
- Select the email(s) you want to remove attachments from
- From the Message menu, choose Remove Attachments
8. Clear Out Old Junk Regularly
If you have more disk space than you’ll ever need, you can keep old files on your Mac without any problems. However, periodically clearing out your old and unused files, media, and applications is a good habit to get into. Your Mac should also be more responsive (because Spotlight won’t need to index so many files) and it’ll mean you’ve got the maximum space available at all times.
A few more tips to remember are:
- Regularly scan the Documents folder within your Home Folder and delete/compress/archive items you never use
- Clear out the Downloads folder regularly as it tends to fill up over time
9. Delete Duplicate Files
You’ve probably got lots of duplicate files on your Mac without even realising. This could include identical iTunes content and other media, as well as identical files that simply have different filenames. There are a few ways to remove duplicates:
- Download a third-party app from the Mac App Store
- Use Finder
- Use a command or script in Terminal
10. Delete iTunes Album Artwork
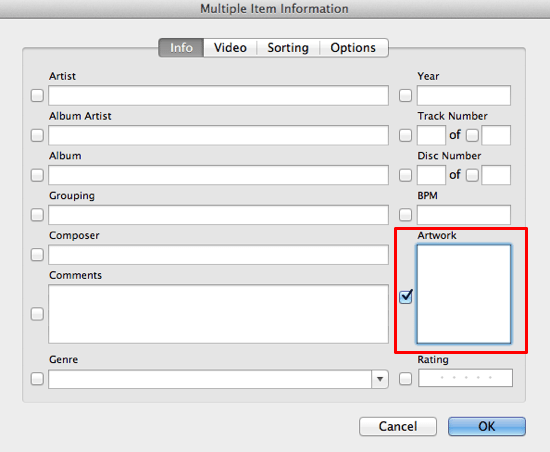
iTunes album artwork can occupy several hundred megabytes of disk space. If you don’t mind not having the album artwork visible, it can be deleted as follows:
- In the Library section on the left, choose Music (or Films, TV Programmes, etc) and select all items using CMD + A
- Select Get Info from the File menu, or just CMD + I and choose Yes when prompted if you want to edit multiple items
- A window appears with various options. Under the main Info tab, click the Artwork box in the lower right corner and tick the unlabelled checkbox next to it. Hit OK, and all your album artwork will be removed
Note that iTunes may also be slightly more responsive when scrolling through the library, because it won’t have to display the artwork.
Top tip: CleanMyMac 3 can perform almost all the tips in this post freeing up a great deal of disk space painlessly – Clean My Mac 3 is available as a FREE download here.




Very very helpful. Thanks a LOT.
Frankly, as a relative newcomer to the the Mac playground – I am amazed at the thousands of duplicate files that are generated by the ‘most advance OS (according to Apple).
Quite ridiculous – something is wrong in the state of Apple – always some other Apps fault. And to then be expected to purchase another App to put it right is a joke.
As far as iTunes goes – it must be the worst piece of software ever designed – a complete mess.
No doubt this will upset the faithful. I can only speak as I find.
Great tips!
Tip #3 is not quite right. The asterisk wildcard does not work in Spotlight. What you’re seeing in your screen shot there is all the documents with asterisks in them. What you want to do go File > Find (in Finder) and leave the search field blank as you fill in the qualifiers such as file size greater than 5 MB. Then it will work as described.
If you have an iPhone or iPad backing up to your Mac (via iTunes) then you can also free up disk space by moving the contents of “~/Library/Application Support/MobileSync/Backup/” (the ~ means “your home folder”) onto an external disk and then deleting them off your Mac’s internal disk drive. Then sync your iPhone and iPad with your Mac and the only backups that will be on your Mac are the most recent ones. Should you need one of the older backups, you can move them back from the external disk into the above folder to make them available to iTunes. This freed up almost 20 GB for me.
Your the genius Mike. I totally agree.
Great tips, Roland!
Mike is RIGHT about iTunes! I still like my Mac. But I hate iTunes!
Also, HamranHansenHansen’s tip about NOT using an asterix helped me a lot! I was going nuts! (Thanks, H!)
Glad I found this article, even in 2014! 🙂
Thanks for the reminder, I have updated the post.
Another great idea is to wipe out unnecessary localization files with Monolingual or ClearDisk
This was really useful, thanks. I was slightly surprised to see when I had followed a lot of this through that according to the info from the apple menu I had less free space than I had when I started. Took me a couple of minutes to figure out what Time Machine was doing! Might be worth mentioning to save others from the same moment of head scratching
Great tips! Do you know how to delete devices from the hard drive? I downloaded a program for school (SofTest) and used the uninstall; however, the white disk is still in my computer. I can eject or compress, but cannot move it to trash.
Great info, and very helpful. I trust that Mike is enjoying his new PC, complete with the blazingly-fast version of WinDoze that comes pre-loaded with the mind-boggling Windows Media Player and numerous variants of blue screens that are always a delightful surprise.
Hey mike reallly i would still call it the most advanced because i have used my Mac for about 1 1/2 years and i found about one duplicate file which is one i manually put into iTunes because it was a home video i downloaded from chrome