The Notes app in OS X El Capitan has thankfully had important changes and new features that were badly needed. The new Notes app is now much more useful, and Mac users will find it can handle some of the more advanced features typically offered by third party apps such as Evernote.
In this article, we’ll run through some of the key changes and how you can make the most of the new features.
Jump right in
To start with, open Notes on your Mac. The app still lives in the Dock by default, but you can also just type Notes into Spotlight if have previously removed it.
At first glance, little appears to have changed in Notes. There is the familiar list of notes on the left under the heading On My Mac, plus there’s a Notes and Recently Deleted sections (which only appears when you delete notes. They are permanently deleted after 30 days, but you can drag any note back into another folder to restore them).
The menu bar can be hidden via the Hide folders button (the first one in the menu bar), or by selecting the same option from the View menu.
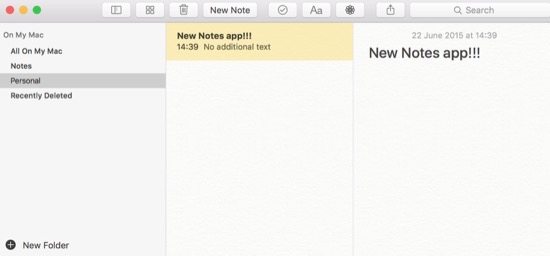
It’s quite handy being able to organise notes in El Capitan now. To do so, tap the New Folder button on the lower left of the folders list (or use SHIFT + CMD + N) and then enter a name for the note.
In order to create a new note there’s a prominent “New Note” button on the toolbar, but you can just as easily use CMD + N to achieve the same thing more quickly.
When you create a new note, it will go into the folder you’ve selected (if any), otherwise it will just live in the default Notes section.
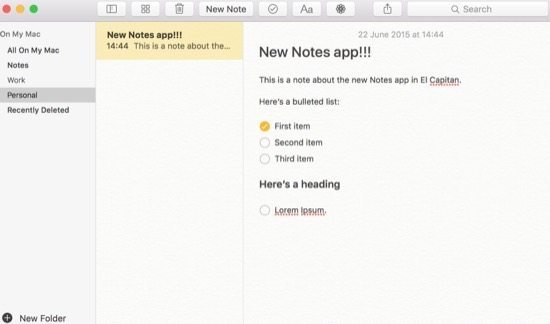
You can only create a flat list of folders rather than a proper hierarchy. In the example below, I’ve created a “Personal” and a “Work” folder, but you can’t create any more sub-folders within those.
Browse notes by attachments
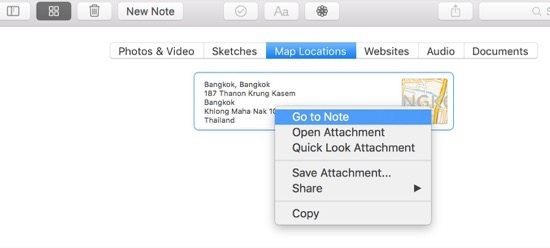
Thankfully, there’s a great way to view all these various types of document in a simple list: select the Browse attachments button, which switches to a separate view with sections for each of the document types:

As you’d expect, if you right-click any item in the list, there are also several more options presented. For example, you can open the attachment, quick look, copy it, save, share, or just go to the note.
Improved formatting options
One of the things people commonly use Notes for is to create bulleted lists of things to do or remember.
The new Notes make that much easier, by selecting the checklist button on the Notes toolbar. You can also check off completed items by placing a check in the boxes, which results in a solid appearance indicating you’ve done it.
You can select SHIFT + CMD + L to make a new checklist anywhere within a note, or by highlighting existing text which converts that into a checklist.
- CMD + SHIFT + T to create a Title
- CMD + SHIFT + H to create a Heading
- CMD + SHIFT + B to create Body text
Text style options
Thankfully, there are a few more formatting options in Notes. New notes now start with a proper Title section (the default can be set in the Format menu, by choosing New notes start with).

You can also select any text and change it quickly the formatting to either a Title, Heading or Body with one of these shortcuts:

All the old formatting options are still available and work as expected, such as CMD + B to make bold text, or CMD + I to switch to italics.
There’s still a font browser (CMD + T), that allows you to choose various fonts and set there options such as the type and size.
You can also choose type of text or list type (e.g. a checklist, or the old style bulleted, numbered or dashed lists) from using the text style button on the main toolbar (shown as Aa).

Richer notes
Notes now lets you add various types of media to any note. For example, photos and video, sketches, audio, web sites, map locations and even documents.
Photos
To insert a photo, click the photos icon or choose Photos Browser from the Window menu, and then choose an image. Once you’ve found a picture, just drag it into the note. You can also then press the spacebar to preview the image (or right-click and choose Quick Look Attachment), or double-click to open in the Preview app.

Documents
It’s also possible just to drag any item from the Finder into the note, where it will appear inline. In the example below, I’ve added a PDF file just by dragging it in.

Websites
In Safari, select the Share button and then choose Notes.

A popup window appears that allows you to add some additional text, as well as choose whether you want to create a new note or add the website to an existing one.

Once you have entered the details, a nicely formatted link is inserted into the note you chose. Double-clicking the link takes you to the website, though you can also use Spacebar to preview the website directly within notes.

Maps
The process to add a map is exactly the same as adding a website from Safari – choose Notes from the Share menu within Maps, and then optionally add some additional text and choose whether you want to create a new note or add to an existing one.
Once the map has been added to a note, you can also switch to browse mode, select the Map Locations tab and view all your maps in one place.

Sketches
For the moment, there doesn’t appear any way to add a sketches into Notes. However, there is also a sketches feature in Notes in iOS 9, that lets you sketch a drawing using your finger. It seems likely that the new Notes app in iOS 9 and El Capitan will synchronise notes via iCloud, and any notes that you create on one device will appear on all of them.
Currently, Notes in Yosemite and iOS 8 can only sync if you have a Mobile Me account, which is quite frustrating to users that don’t. Hopefully, once El Capitan and iOS 9 are available, Notes will sync just like every other native app via iCloud.
Final thoughts
With the latest version of OS X, Apple has thankfully brought Notes up to date and added features that were sorely needed. While it’s not perhaps quite as fully-featured as some of the third party apps, the changes will make Notes more useful than ever, and hopefully with proper iCloud synchronisation with iOS 9 in the autumn, it will be possible to keep your notes organised on every Apple device…




Hi Roland, is it possible to set up a hyperlink in one note to another?
Is it possible to change the DEFAULT size of body text?
It is possible to create a folder hierarchy in notes. Just drag any folder into another folder. You have the ability to collapse the folders embedded in another. And you can do at least 3 levels of folders (haven’t tried more).
The folder hierarchy will appear when synced to iOS devices, but the folders are not collapsible on those devices.
In the Yosemite folders, you could actually make subfolders in the same way. But they were not collapsible, and the hierarchy was not displayed in iOS notes, making the ability to create folders rather useless if you wanted to sync.