The right-click menu on the Mac is full of useful little features that appear specific to any item you’ve selected in Finder. For example, if you select an image and hit right-click, you’ll see menu options such as Set Desktop Picture. For almost every item type there’s a list of corresponding menu options that let you do something related to that item.
Unbeknown to most people, it’s possible to customise the right-click menu, either to add your own useful options or to remove some of those annoying customisations added by applications you may have installed. This tutorial shows you how to customise what’s shown.
Customising the Right-Click Menu
Right-click any file or folder on your Mac and you’ll see a context menu similar to the one shown below. There are lots of options depending upon the type of item you’ve selected (it differs for files, images, and documents for example).
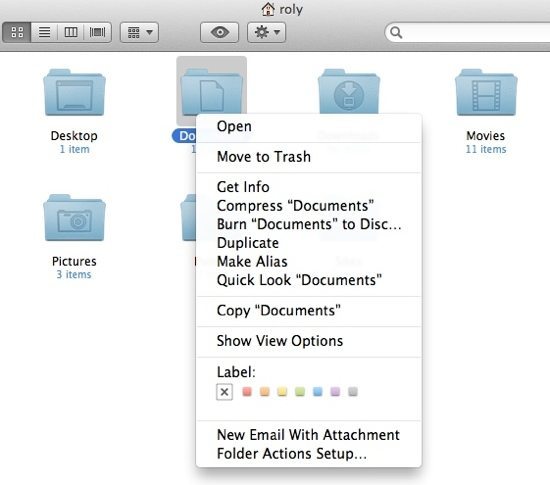
To choose what’s displayed on the right-click menu, follow the steps below:
1. Open System Preferences and then choose Keyboard from the Hardware section
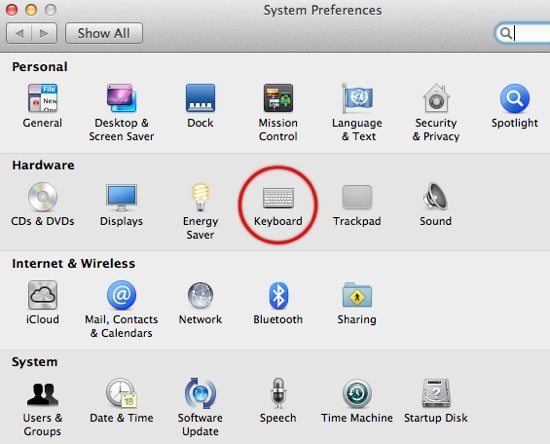
2. Select the Keyboard Shortcuts tab
3. In the left-hand panel, select the Services icon
4. Scroll down the list shown on the right until you see Files and Folders. It should be expanded by default, but if not just expand it to see all the options available. These control what happens when you right-click on files and folders only
5. Check or uncheck every item that you want to be visible – in the example below I’d installed the anti-virus software ClamXav and chosen to hide it from the right-click menu earlier. You can also assign a keyboard shortcut by double-clicking the menu item and typing in any key combination
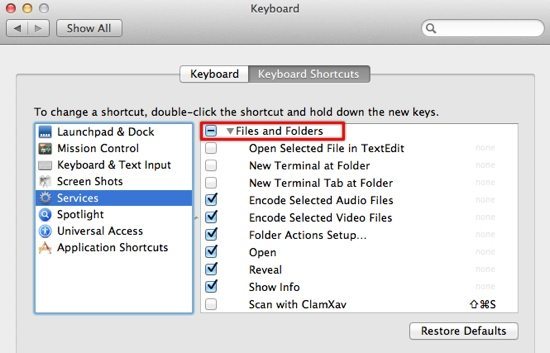
6. Next, you might need to kill the Dock process to make the changes happen (or just log out and log back in). Open Terminal (type it into Spotlight or find it in the Applications -> Utilities folder) and type killall Dock followed by the Enter key
7. Go to Finder and right-click on any file or folder, and you’ll see the updated menu. For example, I selected Scan with ClamXav in the previous step and it now appears back in the menu as shown below
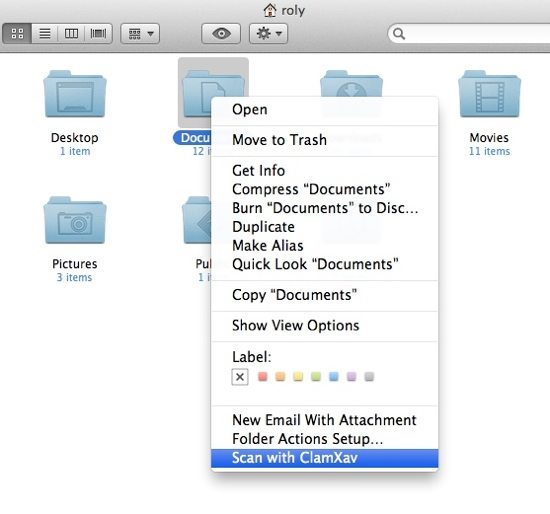
8. If you want to change any other folder actions, there are plenty of options – for example for highlighted text. Find the Text section to see options for when text is selected in any application (such as Mail). In this example I’ve checked Add Contact
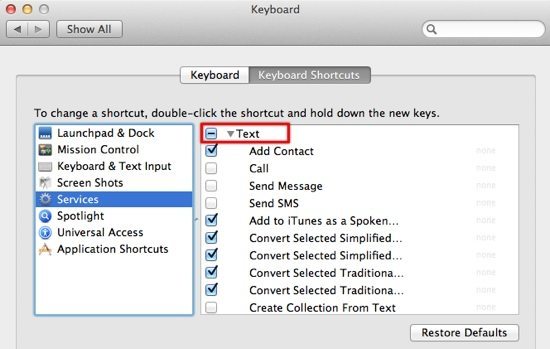
Now go to an app and enter some text (it makes sense to use a name in this example) and highlight it, select right-click and you should now see the item you added to the menu earlier, such as Add Contact as shown below.
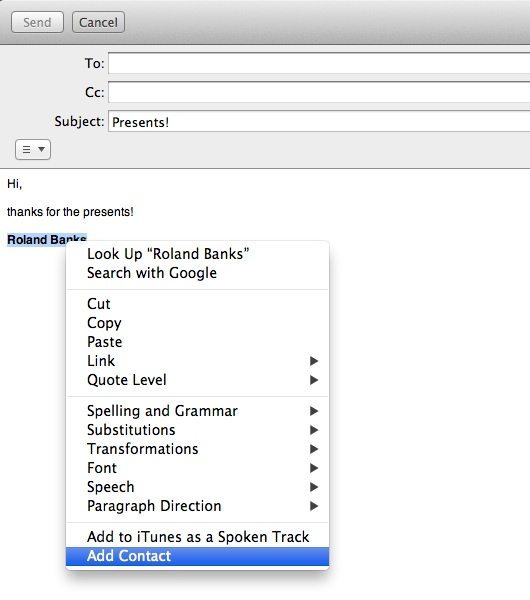
That’s all there is to it – you can add as many right-click options that will apply to any items you’ve selected in Finder!




Thanks for the tips. I had this on my iMAC but the right click custom workflow I created disappeared. I verified that the workflow file is in tact and that the shortcut is enabled. I guess I’ll try deleting and re-doing this to see if it is working again.